How to Start a Garden
We open with a clear promise: this guide sets us up for steady success, not a one-weekend fix. We focus on a simple plan that builds confidence and fits our space, time, and appetite.
Most of us began by making avoidable mistakes: wrong location, an overlarge plot, poor soil, or no water access. This guide prevents that frustration by walking through the right sequence.
We will cover realistic scope, sunlight and placement, water access, bed style, weed control, drainage, soil mix, feeding, season timing, seeds versus seedlings, spacing, watering methods, and protection.
Advice is tailored for the United States, using USDA zones and common hose and irrigation setups, but it stays flexible for different yards, raised beds, and containers.
At the end we aim for a garden we can maintain through the season — one that produces plants and pleasure, not extra work.
Set Expectations and Start Small So We Stick With It
We learn far more from a tiny plot we manage well than from a sprawling bed we neglect. Keeping goals modest helps our garden fit our life and calendar. That means planning around our weekly time and the current season.
Why beginners often struggle and how we avoid common early mistakes
New gardeners burn out when they overbuild and plant too many varieties at once. We reduce that risk by matching our effort to available time and by avoiding work-heavy layouts early on.
Common errors we will skip include putting beds where sun is inconsistent, buying out-of-season plants, and skimping on soil quality.
Choosing a manageable garden size that fits our time and season
Start with one or two beds, a few containers, or a small in-ground patch that suits our time and the season. Pick a size we can maintain during vacations and heat waves.
Plan for easy access and realistic weekly chores so the plot stays productive without overwhelming our schedule.
Picking a short list of vegetables, herbs, and fruit we’ll actually eat
We recommend a shortlist based on meals we make. If we don’t plan to eat it, we won’t plant it.
Good starters: cherry tomatoes, basil, squash, and one fruit like strawberries. These teach us spacing, watering, and pest basics while rewarding our kitchen.
Choose the Best Garden Location in Our Yard
Pick a spot that gets the most sun across the year; sunlight wins over richer soil when fruiting crops are the goal.
Sunlight first: aiming for maximum sun exposure across seasons
Sunlight is the single limiting factor for most edible plants. We observe our yard at morning, midday, and late afternoon before committing.
South-facing placement and planning around shade
In the Northern Hemisphere, south-facing beds catch the most light. Note seasonal shifts: winter sun sits lower and can throw long shadows from trees, fences, and buildings.
Keeping tall crops from shading smaller plants
Place tall crops, like tomatoes, on the north side of beds so they don’t block light from shorter plants. Partial shade works for leafy greens; plan that space intentionally.
- Choose the sunniest practical spot in our yard.
- Map shade sources and watch sun patterns before building beds in the ground.
- Reserve north edges for tall tomato plants and vines.
| Sun Exposure | Suitable Crops | Placement Tip |
|---|---|---|
| Full sun (6+ hrs) | Tomatoes, squash, peppers | Use south-facing beds; keep space clear of shade |
| Partial sun (3–6 hrs) | Leafy greens, herbs | Place near taller beds but not in their shadow |
| Filtered/low sun (<3 hrs) | Limited herbs, shade-tolerant greens | Best for containers or small shaded corners |
Make Sure We’re Close to a Water Source
An overlooked success factor is whether the hose actually reaches our chosen spot. We should make sure watering feels easy on hot days. If it’s a drag, we skip it and plants suffer.
Hose reach vs. hauling watering cans
Test reach using your hose, not a straight-line measure. Walk the hose route around fences, gates, and patios. Add any connectors or extensions you’ll need.
Hand watering works for a tiny bed, and it can be satisfying. But hauling heavy cans over long distances becomes a fast way to burn out.
Planning ahead for a future irrigation system
Note where the spigot sits and where we’d run lines if we install drip or soaker hoses later. Store hoses neatly where they won’t kink or freeze.
- Choose a spot within hose reach or near plumbing.
- Account for routing, gates, and obstacles when measuring.
- Plan spigot upgrades so adding an irrigation line is simple.
Make sure the site supports regular watering. Good access boosts consistency and keeps plants healthy through dry spells.
Pick a Garden Style That Matches Our Space
Our available space and routine should guide which garden type we pick. Choosing between raised beds, in-ground plots, and containers sets expectations for chores, yield, and layout.

Raised bed, in-ground, and container options
Raised beds give strong soil control and keep roots healthier. They cut compaction and block many weeds and burrowing pests. A single raised bed lets us tailor soil and drainage quickly.
In-ground beds work well where soil is already decent and space is permanent. Containers suit patios, apartments, and tight yards. They let us move plants as sunlight shifts.
Choosing based on our needs
Containers can still produce a useful vegetable garden when we pick compact varieties and feed regularly. Raised beds are easier on our backs and keep beds tidy, which helps long-term gardening.
- Sunlight and space
- Budget and permanence
- Pest pressure and soil limits
- Maintenance time and ergonomics
Decide Whether Raised Beds Are Right for Us
Choosing raised beds can turn poor soil and soggy ground into reliable growing areas. They give us predictable drainage and a consistent medium for plants. That makes planning easier and chores less frustrating.
Drainage, root space, and cleaner garden beds
Raised beds lift soil above heavy native ground. That improves drainage and reduces compaction. Better drainage means roots breathe and avoid rot.
Deeper beds give more room for roots. Stronger root systems make plants more drought resistant and productive. Beds with good depth cut the need for constant watering.
They also keep garden beds tidy. Edges stay defined, paths stay usable, and mud is less of an issue during rainy spells.
Blocking burrowing pests from below
In gopher or vole country, we should plan barriers before filling beds. Hardware cloth under the base is a common, effective shield when fitted properly.
Installing that barrier early protects roots and saves crops from being lost after planting.
| Issue | Raised beds | Containers / In-ground |
|---|---|---|
| Poor native soil | Fixes with controlled mix | Requires amendment or pots |
| Drainage | Improves quickly with depth | Depends on site; may stay soggy |
| Burrowing pests | Blocked with hardware cloth | Harder to protect in-ground |
- Build raised if budget and labor allow and pests are a concern.
- Choose containers or in-ground first if funds or time are limited.
- Remember: bed depth matters for roots and long-term success.
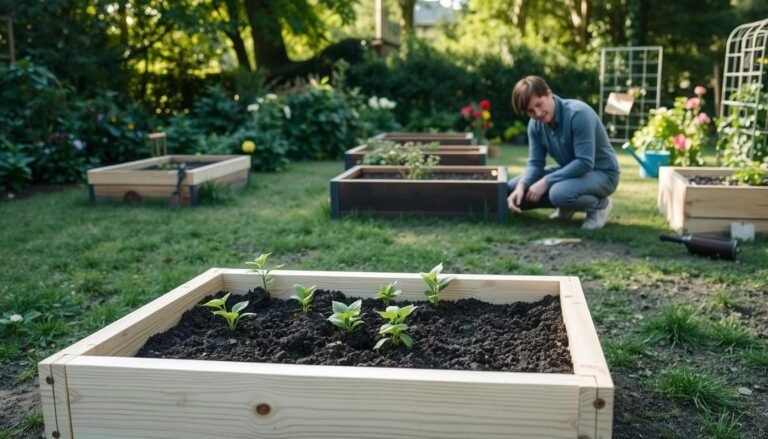
Build Raised Beds That Last
Durable raised beds give us a reliable base for every season of work and weather. We plan dimensions, materials, and paths so maintenance stays simple and predictable.
Choosing bed size and layout with pathways and access in mind
Pick a workable width so we can reach the center from both sides. That avoids stepping into beds and compacting soil.
Keep main pathways wide enough for a wheelbarrow and comfortable weekly chores. Mark the layout on paper, then stake it in the yard before buying lumber or kits.
Going deeper for healthier roots and less frequent watering
Deeper beds give roots more room and buffer moisture swings. That cuts how often we water in hot, windy weather.
Use durable materials and strong corners so the bed holds soil for years. Think of access and paths not as extras but as part of a lasting plan.
| Feature | Recommendation | Why it matters |
|---|---|---|
| Width | 3–4 ft | Reach from both sides without stepping in |
| Depth | 12–18 in (min), 24 in ideal | More root space; less frequent watering |
| Path width | 2.5–3 ft | Wheelbarrow and tool access |
Prep the Ground Under Beds to Stop Weeds and Invasive Grass
Before we set lumber and soil in place, we must deal with whatever is growing under the future beds. Grass and invasive weeds will reach up into garden beds and compete for water and nutrients. That makes maintenance harder and limits plant health.
Why we avoid placing beds directly on grass
Living grass can send roots and runners through bed edges and up into containers. Once the bed is filled, fixing that undergrowth is slow and messy. Don’t skip this step — it’s much harder later.
Cardboard vs. landscape fabric
For light weed pressure, lay overlapping cardboard across the full footprint and wet it down before adding soil. Cardboard breaks down over time and adds organic matter to the ground beneath the bed.
Where crabgrass or aggressive perennials are present, choose a woven landscape fabric rated for heavy weed control. It holds up longer and prevents re-colonization through seams.
- Overlap seams by at least 6 inches so weeds can’t sneak through.
- Cover the entire ground area under the bed and press edges tight to the frame.
- Make sure barriers allow drainage so water doesn’t pool under the bed.
| Situation | Recommended Barrier | Why it works |
|---|---|---|
| Light grass or weeds | Cardboard | Breaks down, adds organic matter, easy to install |
| Aggressive invasives | Landscape fabric | Durable barrier, resists root penetration |
| Concern about drainage | Permeable fabric or cardboard with gaps | Prevents pooling while suppressing growth |
Preparing the ground under beds reduces future weeding and helps plants use soil and water for growth instead of fighting turf. Make sure we install the barrier correctly and our beds will stay cleaner and more productive all season.
Create Great Drainage and Healthy Roots From Day One
If water moves through soil correctly, roots grow deeper and plants resist stress better.

What “moist but not soggy” really means
We define “moist but not soggy” as soil that holds moisture yet drains excess so oxygen reaches roots. That balance helps plants take up nutrients without drowning.
Constant sogginess reduces oxygen, stresses roots, and invites rot and disease. Plants that sit in wet soil lose vigor quickly.
- Check moisture by digging 2 inches down; the subsurface tells the truth.
- Water deeply into the root zone, then let the top layer dry slightly before the next watering.
- Adjust based on bed depth, soil texture, and season rather than a fixed schedule.
| Setup | Drainage Tip | Why it matters |
|---|---|---|
| Raised beds | Use coarse mix and extra depth | Speeds runoff and protects roots |
| In-ground | Amend with compost and sand where clay lingers | Improves structure and prevents pooling |
| Containers | Ensure drainage holes and free-draining mix | Stops water from lingering around roots |
Our simple rule: water thoroughly, then pause long enough for the soil to breathe. That routine gives plants the steady conditions they like and reduces disease risk.
Garden Soil Basics: Don’t Skimp on the Mix
Great garden beds begin with soil we can count on season after season.
Soil is the place we should never cut corners. It controls water hold, drainage, and nutrient supply, and it shapes how resilient our plants will be through heat or drought.
We aim for garden soil that is rich, fluffy, and well-draining rather than dense and clumpy. A simple mix: quality topsoil or screened loam, aged compost, and an aeration amendment such as pumice, perlite, or volcanic rock.
Compost feeds soil life and improves structure. It helps the mix hold moisture while letting excess drain. Adding worms and a handful of worm castings gives long-term benefit—castings are true “black gold” for nutrient density.
| Option | When it works | Key benefit |
|---|---|---|
| Bagged mix | Small beds, containers | Consistent, easy for first beds |
| Bulk delivery | Filling multiple raised beds | Cost-effective for large volumes |
| Aeration amendment | Any soil prone to compaction | Keeps soil fluffy and roots healthy |
Practical plan: start with a dependable mix, plant, then improve the soil each season with more compost and biology. That approach builds lasting, productive raised beds for our garden.
Amend and Feed the Soil to Keep Plants Healthy
A steady feeding plan lets beds produce reliably across every season.
Even good soil loses nutrients as we harvest. Crops remove nitrogen, phosphorus, and potassium, so we replenish lightly and often. That helps keep plants healthy and steady through the year.
Choose mild, balanced, slow-release fertilizers
Pick organic formulas labeled balanced or 5-5-5, 4-4-4, or similar. These release nutrients slowly and reduce the risk of burning young roots.
Avoid heavy, fast-acting salts and large single-dose feeds. Over-fertilizing dries roots and “burns” foliage. When in doubt, apply half the label rate.
- Top-dress with 1–2 inches of compost at season start.
- Add a light granular organic fertilizer before planting.
- Refresh beds when switching crops and again late fall if needed.
| Action | When | Benefit |
|---|---|---|
| Compost top-dress | Each season | Feeds soil life; retains moisture |
| Slow-release fertilizer | At planting | Steady nutrients; low burn risk |
| Light incorporation | Between crops | Restores fertility year after year |
Follow this gentle rhythm and our garden will reward us year after year with healthier plants and steadier yields.
Choose Plants That Match Our USDA Zone and the Season
Knowing our local climate makes plant choices simple and reliable.
We find our USDA hardiness zone using an online lookup and then use a zone-based planting calendar. That calendar sets realistic plant windows for our region rather than one-size-fits-all advice.
Finding our zone and planning planting time
USDA zones tell us which plants will survive winter and which will struggle. Use the calendar to pick planting dates that match our zone and season.
Timing last frost and protecting sensitive crops
Frost dates are critical. They tell us when warm-season plants can safely move outdoors. Tomatoes are a great example: they tolerate no frost and must go out after our last frost date.
| Item | What it tells us | Practical use |
|---|---|---|
| USDA zone | Cold tolerance range | Choose plants suited for our winters |
| Planting calendar | Local sow/transplant windows | Schedule seed starting and transplanting |
| Last frost date | End of freezing risk | Transplant tomatoes and other warm-season crops |
| Seasonal notes | Pest pressure and growth pace | Adjust watering, spacing, and care |
Let local conditions guide our plant list. What succeeds in one state may fail in another, so pick plants and timing that fit our zone and season.
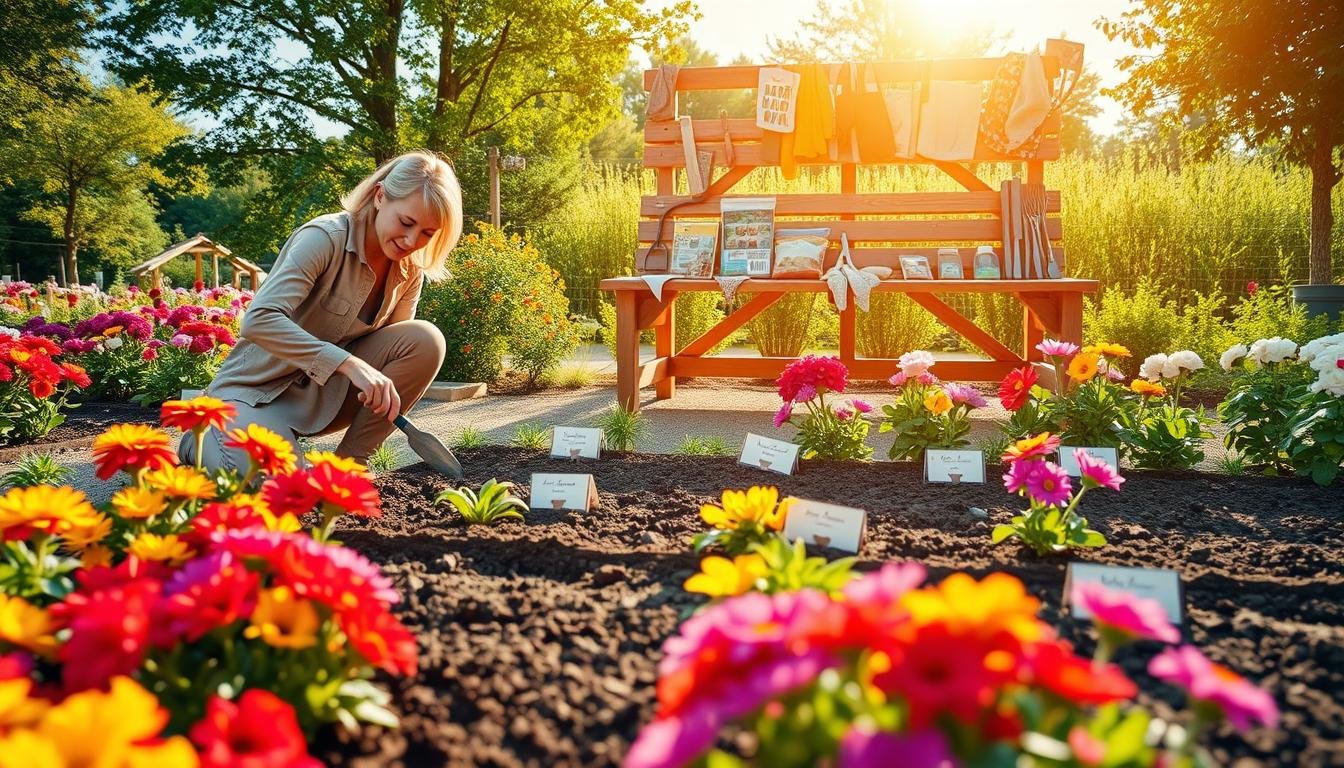
Start From Seed or Buy Seedlings From a Local Nursery
The choice of seed or transplant changes how much time we spend on early care and how fast we harvest.
Seeds are cheaper and let us try many varieties. They need steady warmth, moisture, and patience. Seedlings cost more but cut germination steps and make early wins easier for our starting garden.

Why seedlings are often easiest for beginners
Seedlings shorten the timeline and reduce variables early on. That means less fuss over trays, lights, and missed germination.
Avoiding out-of-season plants at big box stores
Local nurseries stock season-appropriate plants that match our region. Big box stores sometimes sell starts before local conditions are right, especially warm-season plants like tomatoes.
Hardening off and transplanting without shock
Hardening off is a short, gradual routine. Move seedlings outdoors a few hours each day over a week. Increase sun and time daily so stems strengthen and transplant shock is rare.
- Seeds vs seedlings: seeds save money and offer variety; seedlings save time and reduce early failure.
- Inspect seedlings before purchase: sturdy stems, clean leaves, no pests.
- Take time when transplanting—handle roots gently and plant at the right depth.
| Choice | Best for | Key benefit |
|---|---|---|
| Seeds | Low budget, wide variety | Cheaper; more cultivar options |
| Seedlings (nursery starts) | Beginners, quick harvest | Fewer early care steps; faster results |
| Big box starts | Convenience shoppers | Watch for out-of-season stock; inspect health |
| Hardening off | All transplants | Reduces shock; increases survival |
Plan Spacing, Sun Patterns, and Bed Layout Before We Plant
A thoughtful bed layout protects plants, light, and our future harvests. Planning before we dig prevents broken roots, wasted space, and midseason rework.
Read plant tags for mature size in feet
Plant tags list mature width and feet tall. We use those numbers to map real space in beds.
Convert feet into grid squares on a paper sketch. That tells us how many plants fit without crowding.
Prevent overcrowding and protect airflow
Overcrowded plants lose vigor and yield. Tight spacing raises disease risk and makes even watering harder.
Give each plant room to breathe. Spacing is a low-cost way to boost production without extra inputs.
Place tall growers like tomatoes where they won’t shade shorter crops
Put tomatoes and trellised crops on the north side of beds. That keeps sunlight available for lower plants.
Sketch the bed, mark north, list crops by height, then arrange accordingly.
- Plan on paper first to avoid transplant shock and root damage.
- Use tag data: feet tall and feet wide translate directly into spacing.
- Correct spacing is one of the fastest, cheapest performance gains.
| Crop | Typical spacing (feet) | Placement tip |
|---|---|---|
| Tomato | 2–3 ft; 4–6 ft trellised | Back (north) of bed; trellis to save ground space |
| Basil | 1–1.5 ft | Front or between taller crops for scent and pest help |
| Leafy greens | 0.5–1 ft | Middle rows or shaded by taller crops as needed |
| Squash | 3–4 ft | Edge of bed or in its own wide patch to avoid shading others |
Watering Methods That Help Plants Grow Without Stress
Deep, intentional watering trains roots to seek moisture where it lasts. We aim for slow, deep runs that push water into the root zone, followed by a pause that lets the soil breathe. That pattern encourages stronger, deeper roots and steadier plants grow.
What it means when soil “breathes”
When soil breathes, it holds moisture but drains excess so oxygen reaches roots. Constant wetness reduces oxygen and stresses plants even if water is present. We want damp root zones, not soggy beds.
Variables that change watering frequency
Bed depth, season, sun exposure, wind, and mulch all alter how often we water. Deeper beds hold moisture longer. Hot, sunny seasons and windy days increase evaporation. Mulch cuts surface loss and lowers frequency needed.
- Deeper bed = less frequent deep watering.
- Summer and full sun = check soil more often.
- Mulch reduces surface evaporation and helps soil stay balanced.
Hand watering vs. drip lines and irrigation system timing
Hand watering gives precise control and feedback; we feel soil and adjust. Drip lines offer consistency and save time on larger plots. An irrigation system becomes helpful for bigger beds, frequent travel, or dry climates where daily watering would otherwise be required.
| Method | Best for | Pros / Cons |
|---|---|---|
| Hand watering | Small beds, spot checks | Precise control; time consuming for many beds |
| Drip irrigation | Multiple beds, consistent schedules | Efficient water use; needs setup and occasional maintenance |
| Full irrigation system | Larger gardens, frequent travel | Automates care; best when paired with timers and zones |
Watch and adjust rather than following a rigid schedule. Check a few inches below the surface; that soil test tells the truth about moisture and when our plants grow need the next deep drink.
Protect Our Garden From Wildlife, Pests, and Problem Conditions
A small, early investment in protection saves endless repair later. We treat protection as part of our layout, not an emergency fix after damage appears.
First, assess local pressure: note rabbits, deer, squirrels, and birds. Match barriers to the threat and garden size so solutions stay effective and simple.
Practical fencing and access
Pick fence height and mesh that suit the animal. Low wire or chicken wire stops rabbits; tall, sturdy panels block deer. Keep gates tight and gaps sealed so animals cannot slip in.
Manage burrowing pests with smart bed setup
Install hardware cloth under the bed during build. That below-bed barrier prevents gophers and voles from reaching roots and saves crops from repeated losses.
- Plan protection early so wildlife does not learn the site.
- Balance strength with maintainability; avoid overbuilt solutions that block work.
- Make sure gates and panels allow easy watering, weeding, and harvest access.
| Threat | Recommended Barrier | Key Benefit |
|---|---|---|
| Rabbits | 6–12 in mesh low fence | Stops nibbling on seedlings and low plants |
| Deer | 6–8 ft solid or angled fence | Prevents large browsing and repeated visits |
| Burrowers (gophers, voles) | Hardware cloth under beds | Protects roots and stops underground access |
| Birds & Squirrels | Netting or lightweight cages | Covers fruit and young transplants without blocking airflow |
Good protection keeps plants healthier and reduces stress. That steady outcome helps us keep plants productive through the season while letting us maintain beds without extra toil.
How to Start a Garden We’ll Love Tending All Season Long
A resilient garden grows from steady choices, not frantic fixes.
We recap what matters most: start small, favor sun, keep water handy, and pick a layout we can maintain. Good soil makes every chore easier — better drainage, simpler watering, and healthier plants all season.
Key execution steps: install a weed barrier under beds, give roots proper depth, follow spacing on tags, and water deeply and consistently. Prioritize vegetables, herbs, and fruit we will eat so harvests don’t go unused.
Gardening is about steady progress. Treat mistakes as lessons, upgrade over time, and measure success by whether the garden fits our life and stays enjoyable all season long.